Quickstart: your first calibration
This tutorial walks through a complete calibration end to end. It assumes the stack is installed and running.
This page is a scaffold. The detailed, screenshot-driven walkthrough will be filled in as the wizard steps reach their hi-fi passes.
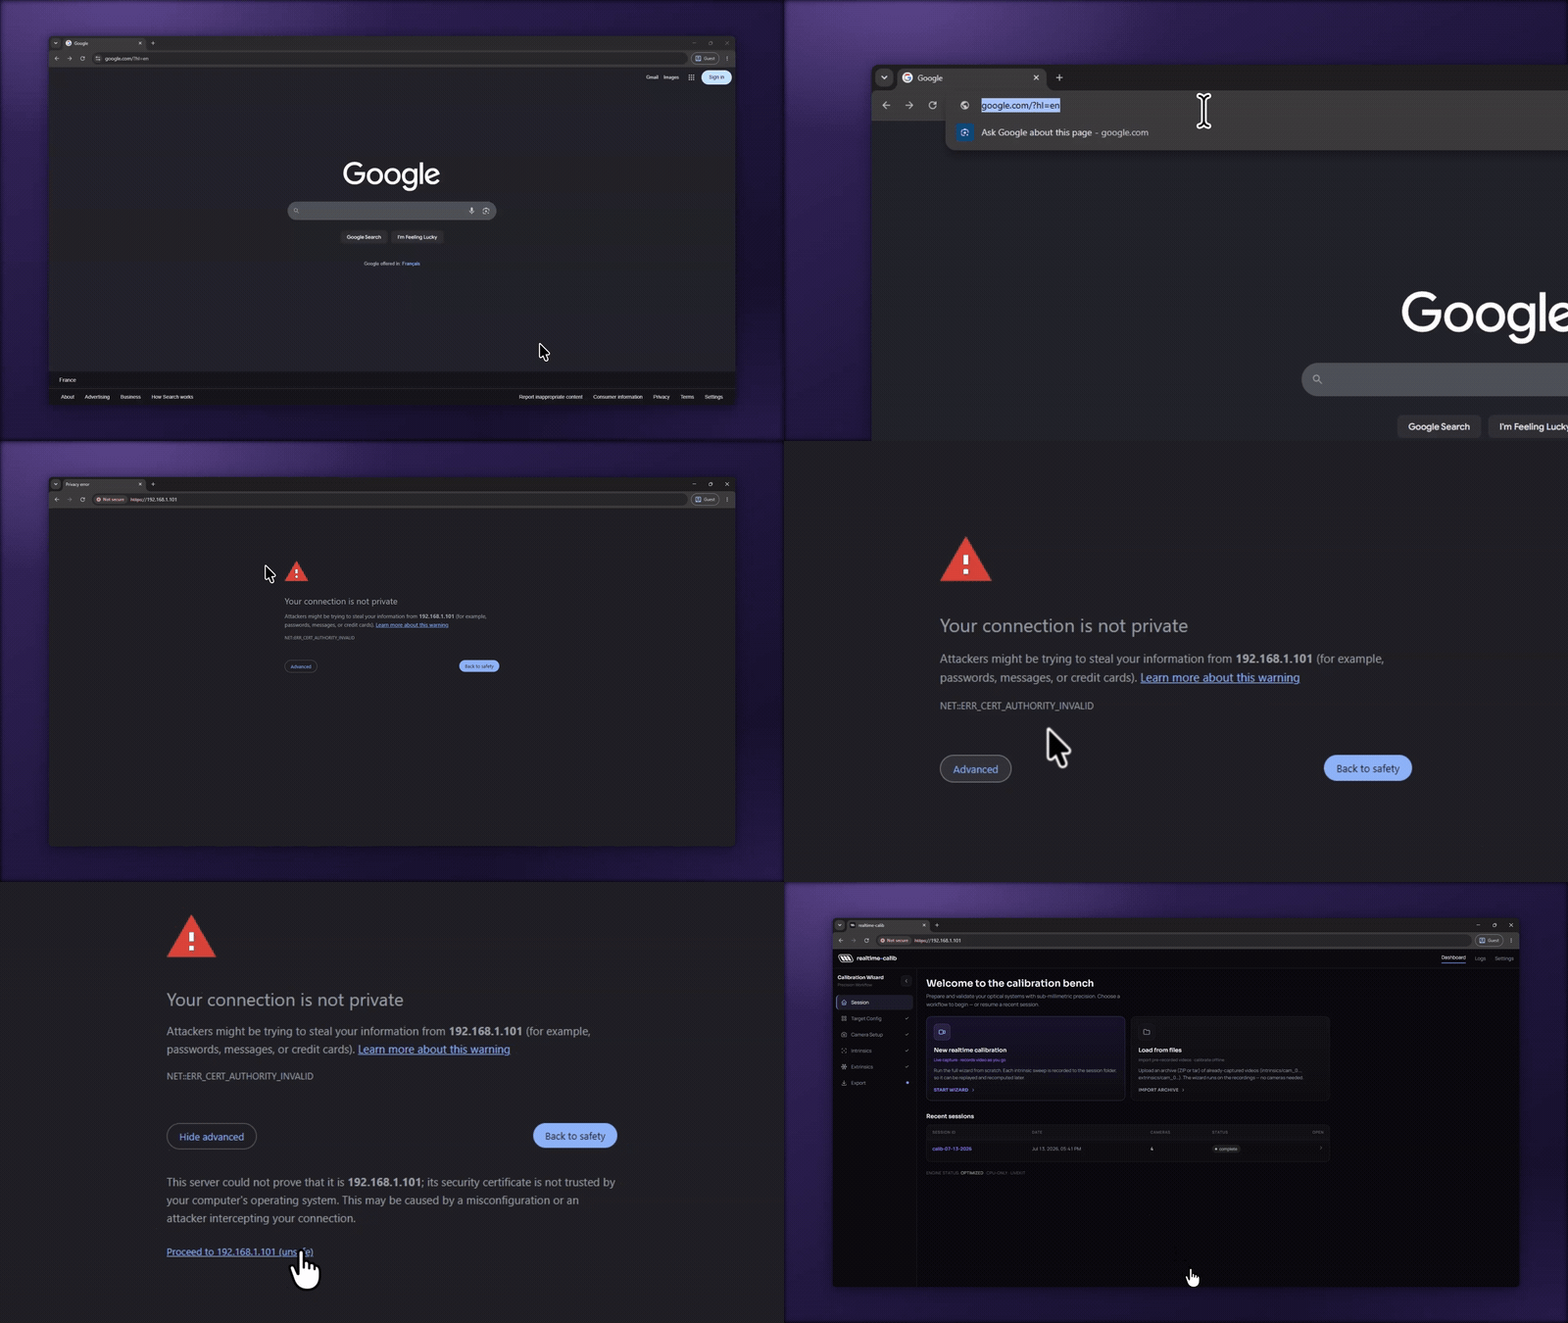
First access from a tablet or phone
The stack serves HTTPS over your LAN with a local mkcert certificate. The
host machine trusts it, but other devices don't know that certificate authority
yet — so the first time you open the app from a tablet or phone, the browser
warns "Your connection is not private" (NET::ERR_CERT_AUTHORITY_INVALID).
This is expected and safe on your own network: the connection is still encrypted; the warning is only about who issued the certificate, not a real interception. To continue:
- Chrome / Edge / Android: tap Advanced, then Proceed to
<HOST_IP>(unsafe). - Safari / iOS: tap Show Details, then visit this website.
To remove the warning permanently, install the mkcert root CA on the device.
1. Start or load a session
Open the web app — you land on the Dashboard ("Welcome to the calibration bench"). Nothing in the wizard is reachable yet: every step stays locked until a session exists. Pick one of the two entry modes:
- New realtime calibration — start the full wizard from scratch. Live capture, and each sweep is recorded to the session folder so it can be replayed and recomputed later.
- Load from files (in development) — open an existing session folder; the app reads the artifacts already there (camera videos, board, results) and derives the wizard state so you can recompute or resume.
Once a session is created or opened, the wizard rail unlocks and follows the persisted step.
→ Details: Start or load a session
2. Define a board — Target Config
Go to Target Config. Set up the calibration board (ChArUco is recommended). The board's geometry and scale must match the physical board you print. You can use a single board for both intrinsic and extrinsic — the extrinsic step inherits the intrinsic board by default — or define two distinct boards. This is the first step: Camera Setup stays locked until the intrinsic board is defined (board-first).
→ Details: Calibration board
3. Configure your cameras — Camera Setup
Go to Camera Setup. The service discovers connected USB cameras and shows a live preview for each.
→ Details: Configure cameras
4. Intrinsic calibration (camera by camera)
For each camera, move the board through the field of view while live overlays show coverage and per-view reprojection error. Each sweep is recorded, then a Prepare / replay step lets you review the recording and tune what the compute uses before solving — trim the clip (start/end), set a sampling stride (1 frame every N), and cap the number of frames kept — then compute and inspect the results.
→ Details: Intrinsic calibration
5. Extrinsic calibration & 3D review
Present the board so pairs of cameras see it simultaneously. As with intrinsics, a Prepare / replay step lets you scrub the synchronized frame groups side by side and tune the compute (sampling stride, minimum shared views) before solving. Poses are chained from an anchor camera and refined with bundle adjustment. Finally, inspect the reconstructed rig in the 3D view — the closing sub-step of extrinsics.
→ Details: Extrinsic calibration
6. Export
Export your calibration — Caliscope-native TOML and/or engine-ready JSON (three.js, Blender, Unity, Unreal).
→ Details: Export
You now have a full intrinsic + extrinsic calibration, exported to the convention your target needs. See the Calibration output files reference for the exact fields.